Using Docker init to quickly dockerize your PHP application

How about asking Docker to create the files it needs itself?
If you're a regular reader of this blog, you'll know by now that you need a Dockerfile to describe how the Docker image should be created and what should be included in it, and very often you'll also need a composer.yaml file to explain how the container should be created, e.g. which port to map to, which volumes to use, and so on.
Imagine you've an existing PHP application and you don't want to create the files needed for the dockerization by hand.
You just want to very quickly and using a wizard, to be able to answer to some questions and hop, it's ready.
The docker init command is the one you're looking for.
Get some scripts
As an illustration, I'll use my aeSecure Quickscan project already introduced in my blog (see my aeSecure - QuickScan - Free viruses scanner post).
This is a Web application that scans files (a local website) for patterns that might indicate the presence of a virus.
So, to run aeSecure QuickScan, we need PHP and Apache.
Let's play...
First, we'll create a temporary folder and grab a copy of the script:
mkdir -p /tmp/aesecure_quickscan && cd $_
curl https://raw.githubusercontent.com/cavo789/aesecure_quickscan/master/aesecure_quickscan.php -o index.php
You've now a local version of the script. It's a single index.php script; nothing more at this stage.
Docker init
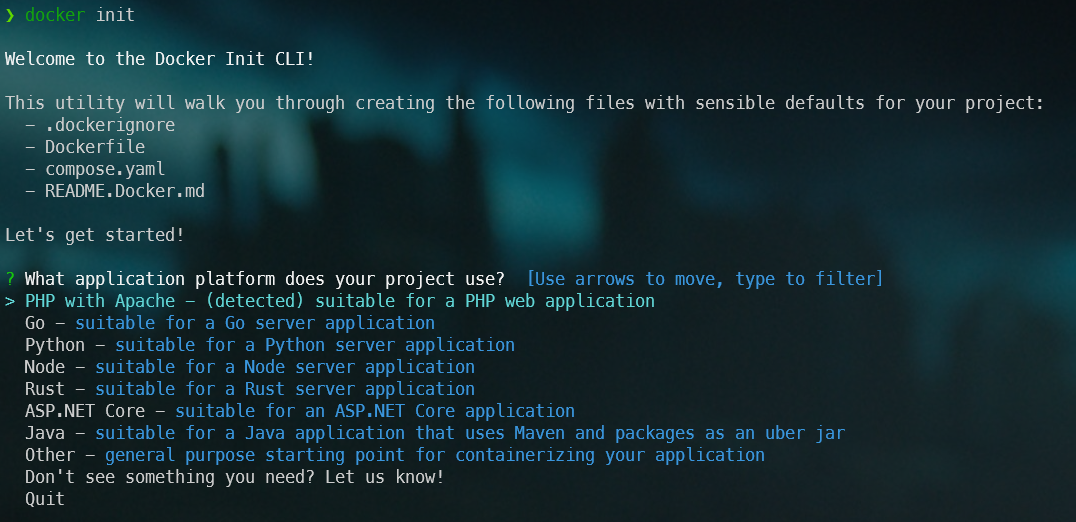
Just start docker init in the console:

As we can see, Docker init has already detected the presence of a PHP file so he's suggesting PHP with Apache. Great, just press Enter.
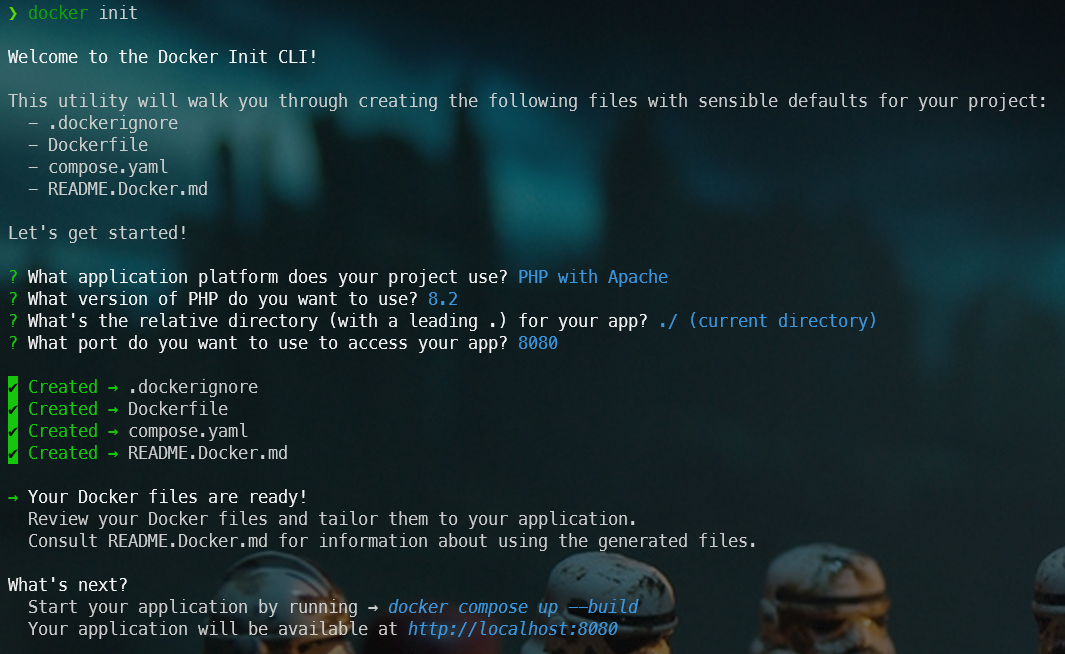
The next question will be about the version of PHP, type the one you wish (f.i. 8.2) and press Enter.
The third question will be about the relative path to use for the project. In our case, our PHP script is located in the root folder of our project (not in f.i./app) so just press Enter.
Now, you'll need to specify which port should be used for the application, I'll use the port 8080 but you can use the one you wish (as soon as not yet used).
And that's it.

It's too simple, isn't it? Let's try the suggested commands and see if the site actually works.
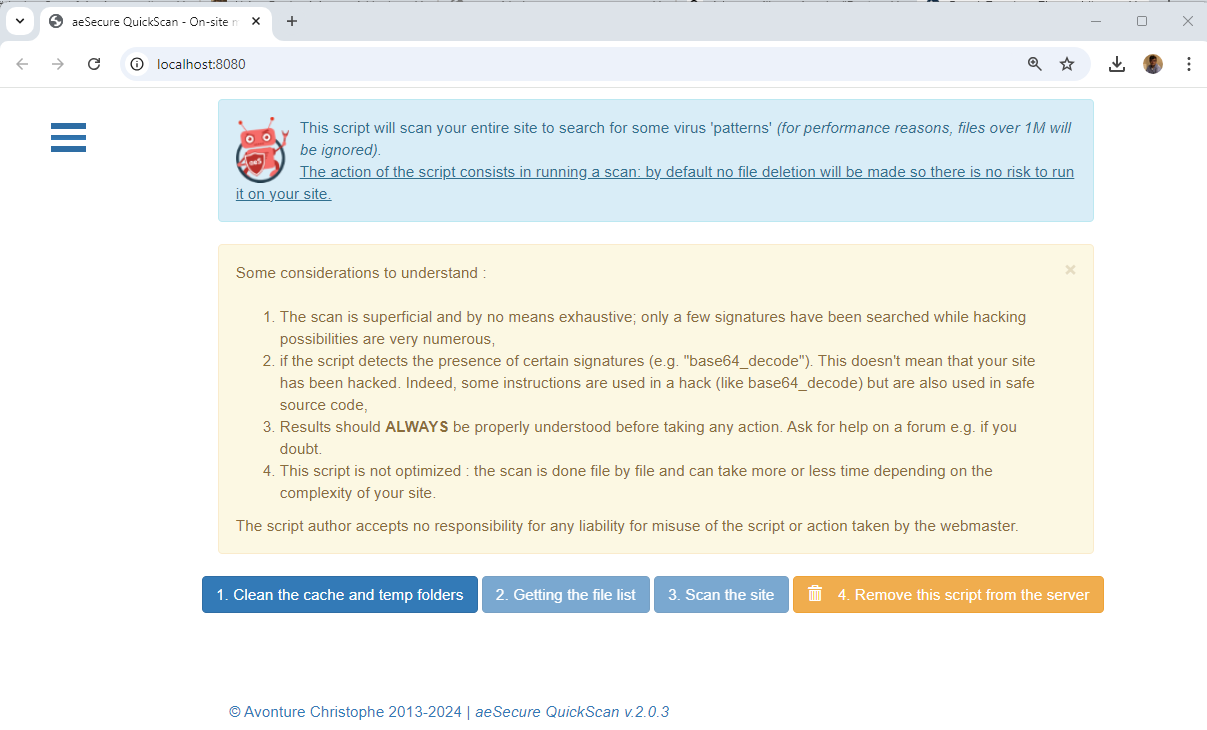
First, create the container by running the docker compose up --build command then, once finished, just open your browser and surf to your local site (in my case http://localhost:8080) and ...

Let's take a look on created files
.dockerignore
The .dockerignore file specifies files and directories that should be excluded from Docker builds. So, by creating a Docker image you'll certainly don't want that f.i. the .git folder is copied into the image. That folder (and many others) should stay on the computer.
By opening that file with a code editor, you'll then see that line:
**/.git
Refers to https://docs.docker.com/go/build-context-dockerignore/ for more explanations.
compose.yaml
Previously, the file was named docker-compose.yml (or docker-compose.yaml).
The file will teach Docker how to make more than one container work together, f.i. our PHP application and a database service.
By opening the file, you'll see that right now, the only un-commented lines are those:
services:
  server:
    build:
      context: .
    ports:
      - 8080:80
The rest is just for illustration.
Refers to https://docs.docker.com/go/compose-spec-reference/ for more explanation.
Dockerfile
There are a lot of commented lines, if we look at un-commented ones, we can see this:
FROM php:8.2-apache

COPY . /var/www/html

RUN mv "$PHP_INI_DIR/php.ini-production" "$PHP_INI_DIR/php.ini"

USER www-data
So, we'll use the PHP 8.2 Docker image shipped with apache in it (one image with both PHP and Apache).
We'll copy all files from our project (remember, our project is stored in folder /tmp/aesecure_quickscan) into the /var/www/html folder of the image. All files? Not, that's incorrect. Remember the .dockerignore file: we'll copy all files that are not mentioned in .dockerignore.
Docker has also foreseen to rename the standard php.ini-production file as php.ini.
The last command is to switch to the www-data user (so the container will not be running as root).
Refers to https://docs.docker.com/go/dockerfile-reference/ for more explanation.
README.Docker.md
As a remember of how to use your dockerized application, this file will give you the essentials commands to run.
Generated files are yours
The generated files won't be modified by Docker while you'll not run docker init again. This means you can make any changes you like to the files, but your changes won't be lost. It's a great way to quickly dockerized an application.
The example given in this blog post is a stand-alone project so docker init does all the magic. Assuming we'd needed a database, all we have to do is return to the `compose.yaml´ file and un-comment the lines like below:
services:
  server:
    build:
      context: .
    ports:
      - 8080:80
    depends_on:
      db:
        condition: service_healthy
  db:
    image: postgres
    restart: always
    user: postgres
    secrets:
      - db-password
    volumes:
      - db-data:/var/lib/postgresql/data
    environment:
      - POSTGRES_DB=example
      - POSTGRES_PASSWORD_FILE=/run/secrets/db-password
    expose:
      - 5432
    healthcheck:
      test: [ "CMD", "pg_isready" ]
      interval: 10s
      timeout: 5s
      retries: 5
volumes:
  db-data:
secrets:
  db-password:
    file: db/password.txt
Hey! Did you see? Instead of hardcoding the password in the file, docker init has used a secret. This is smart.
To make the example here above working, just create a folder called db with a file called password.txt there and paste it your database password.
Of course, files generated by docker init are just skeletons: you can change what you want, so if you don't want to use secrets, no problem, you can hardcode the password; it's up to you.