Create your Joomla website using Docker - Part 2

At the end of 2023, I wrote a very long post about using Joomla with Docker: Create your Joomla website using Docker - Part 1.
It was a step-by-step introduction to Docker and the creation of a local Joomla-based website.
I explained, at length, the various steps involved in creating a website, choosing a database engine (MySQL, MariaDB or PostgreSQL), choosing a specific version of Joomla / database engine, the type of volumes (should the site and database be kept in RAM or on the hard disk (i.e. the notion of volumes)) and many other things such as choosing the port for the website, creating an alias (something like http://my_project.local instead of http://127.0.0.1). I strongly urge you to read or re-read this article before starting this one.
Here is the link to that article : Create your Joomla website using Docker - Part 1.
As Docker and Joomla are evolving rapidly, I propose here to start from where we were and see what has changed since then.
We're also going to take automation a step further, making much greater use of the concept of makefile and a configuration file called .env.
Prerequisites
In contrast to article Create your Joomla website using Docker - Part 1, where I began by explaining down a few concepts before moving on to discuss the subject, let's do the opposite here: let's start with the three files we are going to use, and then see how they work. Please don't try too hard to understand the contents of the files; we'll come back to that later.
Create the three files in a folder on your hard disk for the time being (f.i. in /tmp/joomla), so that we can quickly get to the heart of the matter: creating a Joomla site with just one line of commands to run on your computer.
Our orchestration file: compose.yaml
We need a file that will explain to Docker how we want to configure Joomla and, also, the type of database we want.
Our orchestration file will also inform Docker that we want the Joomla site to be persistent, i.e. the files to be saved on our hard disk. The same applies to the database.
We need to do this so that, if we voluntarily remove the Docker container to release memory f.i., we want that the Joomla website is saved on disk. So, next time we will wake up our site, files and database tables will be restored.
There are two types of persistence, the one managed natively by Docker (intern volumes) or the one where we'll see the files in our project's folder (mounted volumes). We'll opt for the latter. See my article Using volumes with Docker, use cases if you want to learn more.
We're also going to define a dependency (based on depends_on and healthcheck): Joomla must wait for the database server to be ready before starting its installation (in fact, if the Joomla installer tries to access MySQL before the system is even loaded, our project will crash during container loading).
As you can see, our compose.yaml file is of tremendous importance for the proper definition of our project.
In recent months, the name of the file to be used has changed from docker-compose.yml to compose.yaml; still supported for now, but might as well use the new name. See docs.docker.com if you want more info about this change.
Please create a new folder (f.i. mkdir /tmp/joomla && cd $_) on your hard disk and create the compose.yaml file with this content:
name: ${PROJECT_NAME:-your-project-name}

services:
  joomla:
    image: joomla:${JOOMLA_VERSION:-latest}
    container_name: ${CONTAINER_PREFIX:-joomla}-app
    restart: always
    ports:
      - ${WEB_PORT:-8080}:80
    environment:
      - JOOMLA_DB_HOST=joomladb
      - JOOMLA_DB_NAME=${DB_NAME:-joomla}
      - JOOMLA_DB_PASSWORD=${DB_PASSWORD:-examplepass}
      - JOOMLA_DB_USER=${DB_USER:-joomla}
    depends_on:
      joomladb:
        condition: service_healthy
    user: ${UID:-1000}:${GID:-1000}
    volumes:
      - ./joomla_data:/var/www/html
    networks:
      - joomla_network

  joomladb:
    image: mysql:${MYSQL_VERSION:-latest}
    container_name: ${CONTAINER_PREFIX:-joomla}-db
    restart: always
    ports:
      - ${MYSQL_PORT-:3306}:3306
    environment:
      - MYSQL_DATABASE=${DB_NAME:-joomla}
      - MYSQL_PASSWORD=${DB_PASSWORD:-examplepass}
      - MYSQL_RANDOM_ROOT_PASSWORD='1'
      - MYSQL_USER=${DB_USER:-joomla}
    healthcheck:
      test: ["CMD", "mysqladmin" ,"ping", "-h", "localhost"]
      timeout: 20s
      retries: 10
    user: ${UID:-1000}:${GID:-1000}
    volumes:
      - ./db_data:/var/lib/mysql
    networks:
      - joomla_network

networks:
  joomla_network:
We'll use a configuration file called .env
We're also going to use a configuration file named .env (which is never anything more than a silly dictionary of keys - values) to differentiate our projects.
Please create a second file called .env with this content:
CONTAINER_PREFIX=joomla
DB_NAME=joomla
DB_PASSWORD=examplepass
DB_USER=joomla
JOOMLA_VERSION=5.2.0-php8.3-apache
MYSQL_PORT=3306
MYSQL_VERSION=8.4.2
PROJECT_NAME=running-joomla-in-docker
WEB_PORT=8080
Using a .env file is really useful to no more do changes to the compose.yaml file which can be standard in all your projects.
If you need two or more Joomla websites (you're a web agency starting to use Docker for your development), you'll be able to only do changes to the .env file by updating the WEB_PORT (each project should have his unique port) and, you'll probably update the PROJECT_NAME too to f.i. your customer name.
WEB_PORT, PROJECT_NAME, ... are just variables. If you look back to your just copied/pasted compose.yaml content, you'll retrieve these variables like on the line image: joomla:${JOOMLA_VERSION:-latest}.
The ${XXX:-yyy} syntax means: if the variable exists, use it (the XXX part) otherwise use a default value (the yyy part).
So, here, if JOOMLA_VERSION exists and this is the case in our .env file, then use his value. We'll then use image: joomla:5.2.0-php8.3-apache. If JOOMLA_VERSION was missing in our .env, then we'll use latest and thus image: joomla:latest.
Let's make our lives simpler and lazier; using a makefile
The third and last file we'll use is being called makefile and that file will contain some scripts i.e we'll create a script called up for building our website.
To be able to use a makefile, you should have GNU Make binary installed on your machine.
If you don't know if you already have GNU make, just run which make in the console. If you see make not found then please run sudo apt-get update && sudo apt-get install make to proceed the installation.
So, please create a file called makefile in your current directory with this content:
-include .env

config:
	@UID=$$(id -u) GID=$$(id -g) docker compose config

down: stop
	-@UID=$$(id -u) GID=$$(id -g) docker compose down

log:
	-@UID=$$(id -u) GID=$$(id -g) docker compose logs

reset: down
	-@rm -rf db_data joomla_data

start:
	@clear
	@printf "\033[1;33m%s\033[0m\n\n" "To start your site, please jump to http://127.0.0.1:${WEB_PORT}"
	@printf "\033[1;33m%s\033[0m\n\n" "Go to http://127.0.0.1:${WEB_PORT}/administrator to open your backend."

	@printf "\033[1;104m%s\033[0m\n\n" "Below a summary of your current installation:"

	@printf "\033[1;34m%s\033[0m\n\n" "JOOMLA"
	@printf "\033[1;34m%-30s\033[0m\033[1;104m%s\033[0m\n" "  * Project name" "${PROJECT_NAME}"
	@printf "\033[1;34m%-30s\033[0m\033[1;104m%s\033[0m\n" "  * Version" "${JOOMLA_VERSION}"
	@printf "\033[1;34m%-30s\033[0m\033[1;104m%s\033[0m\n\n" "  * Port" "${WEB_PORT}"

	@printf "\033[1;34m%s\033[0m\n\n" "DATABASE"
	@printf "\033[1;34m%-30s\033[0m\033[1;104m%s\033[0m\n" "  * Host" "joomla-db"
	@printf "\033[1;34m%-30s\033[0m\033[1;104m%s\033[0m\n" "  * User name" "${DB_USER}"
	@printf "\033[1;34m%-30s\033[0m\033[1;104m%s\033[0m\n" "  * Password" "${DB_PASSWORD}"
	@printf "\033[1;34m%-30s\033[0m\033[1;104m%s\033[0m\n" "  * Database name" "${DB_NAME}"
	@printf "\033[1;34m%-30s\033[0m\033[1;104m%s\033[0m\n" "  * Version" "${MYSQL_VERSION}"
	@printf "\033[1;34m%-30s\033[0m\033[1;104m%s\033[0m\n\n" "  * Port" "${MYSQL_PORT}"

stop:
	-@UID=$$(id -u) GID=$$(id -g) docker compose stop

up:
	-@mkdir -p db_data joomla_data
	@UID=$$(id -u) GID=$$(id -g) docker compose up --detach --build
It's terribly vicious because it's totally silent: the indentation in a makefile must be tabs, not spaces. When you copy/paste the above code to create your file, make sure your text editor uses tabs. If it doesn't, the commands defined in the file won't work.
If you want to learn more about GNU Make, check my Linux Makefile - When to use a makefile article
Before starting
We're ready. Just before you begin, please check that you have the three files below (please run ls -alh):
> ls -alh

Permissions Size User       Group      Date Modified    Name
drwxr-xr-x     - christophe christophe 2024-10-18 13:30 .
drwxrwxrwt     - root       root       2024-10-18 13:30 ..
.rw-r--r--   140 christophe christophe 2024-10-18 13:30 .env
.rw-r--r--   838 christophe christophe 2024-10-18 13:30 compose.yaml
.rw-r--r--   327 christophe christophe 2024-10-18 13:30 makefile
Check our configuration
By running make config (config is an action we've defined in our makefile), we can display the configuration of our project on the screen (just display, nothing is fired). We should see a lot of technical information starting with something like:
name: running-joomla-in-docker
services:
  joomla:
    container_name: joomla-app
    depends_on:
      joomladb:
        condition: service_healthy
        required: true
    environment:
      JOOMLA_DB_HOST: joomladb
      JOOMLA_DB_NAME: joomla
      JOOMLA_DB_PASSWORD: examplepass
      JOOMLA_DB_USER: joomla
    image: joomla:5.2.0-php8.3-apache
    networks:
      joomla_network: null
    ports:
      - mode: ingress
        target: 80
        published: "8080"
        protocol: tcp
    restart: always
    user: 1002:1002
[...]
The output here above is a partial content and just show the first lines displayed to the console by the make config command.
The objective of make config is to make sure that all files are correct (otherwise we'll get error messages) and that variables are well replaced by their values. You can see f.i. that the Joomla version is well the one we've specified in the .env file and the user line (the last line here above) is correctly initialised to the user_id:group_id of your current user.
The user_id:group_id will vary depending on your own configuration. It'll be 1000:1000 in the most situations but this can be something else when, f.i., you've defined more than one user in your Linux distribution; the first user probably be 1000:1000, the second 1001:1001 and so on.
Let's wake up Joomla...
Here we are at the heart of the subject: we would like to see a beautiful, fresh Joomla site. Is it possible to do this in a single command and even without having to install anything by hand?
The answer is "Yes" and make up will do the magic.
In your console, just run make up and please wait one minute. The very first time, you'll get something like this in your console:
> make up

UID=$(id -u) GID=$(id -g) docker compose up --detach
[+] Running 33/12
 ✔ joomla Pulled                                         16.1s
 ✔ joomladb Pulled                                       10.7s

[+] Running 3/3
 ✔ Network runningjoomlaindocker_default  Created         0.0s
 ✔ Container joomla-db                    Healthy        31.7s
 ✔ Container joomla-app                   Started        31.1s
What does that mean? Docker has retrieved (pulled) from the Internet our joomla and joomladb services (in other terms, has downloaded the Joomla CMS (including PHP and Apache) and MySQL).
By running docker container list --all --format "table {{.Image}}\t{{.Names}}\t{{.Status}}\t{{.Ports}}" (or just docker container list to get all the columns), you'll get the list of running containers:
IMAGE                        NAMES        STATUS                   PORTS
joomla:5.2.0-php8.3-apache   joomla-app   Up 6 minutes             0.0.0.0:8080->80/tcp
mysql:8.4.2                  joomla-db    Up 7 minutes (healthy)   3306/tcp, 33060/tcp
As we can see, yay!, we have our two services (named containers) which are Joomla and MySQL and they are both Up (see the Status column). We see that Joomla uses port 8080 and MySQL uses port 3306.
The port 8080 is the one we've specified in our .env (variable WEB_PORT) and, the same for MySQL, it uses port 3006 because that's the one we defined (MYSQL_PORT).
Note that 3306 is the standard port for MySQL.
We've created our Joomla website by just running one command. Don't trust? Open your browser and surf to http://127.0.0.1:8080.
... or let's ask him to fall asleep (keep containers)
The opposite command to make up is make stop. The stop action will stop our Joomla and MySQL containers (read make them sleeping) but without removing files (your site and your database) from your hard drive. By running make up again, you'll retrieve them. up and stop are like a light switch.
... or let's ask him to remove containers (free more memory)
The make down command will stop the containers as well remove them. But in our case, we'll still have files on our hard disk so we'll not lose our website.
... or let's ask him to suicide (remove containers and files)
The make reset command will stop containers but, too, remove files on the disk.
By running make reset, you'll lose everything and be ready to create a new fresh website.
Getting access to Docker logs
Sometimes, if something goes wrong, it's nice to have access to the Docker logs. Simply run make log to achieve this.
Logs will look like this:
joomla-db  | 2024-10-13 13:30:25+00:00 [Note] [Entrypoint]: Entrypoint script for MySQL Server 8.4.2-1.el9 started.
joomla-db  | '/var/lib/mysql/mysql.sock' -> '/var/run/mysqld/mysqld.sock'
joomla-db  | 2024-10-13T13:30:26.058140Z 0 [System] [MY-015015] [Server] MySQL Server - start.
joomla-db  | 2024-10-13T13:30:26.238267Z 0 [System] [MY-010116] [Server] /usr/sbin/mysqld (mysqld 8.4.2) starting as process 1
joomla-db  | 2024-10-13T13:30:26.239450Z 0 [Warning] [MY-010122] [Server] One can only use the --user switch if running as root
joomla-db  | 2024-10-13T13:30:26.246482Z 1 [System] [MY-013576] [InnoDB] InnoDB initialization has started.
joomla-db  | 2024-10-13T13:30:26.568703Z 1 [System] [MY-013577] [InnoDB] InnoDB initialization has ended.
joomla-db  | 2024-10-13T13:30:26.852192Z 0 [Warning] [MY-010068] [Server] CA certificate ca.pem is self signed.

[...]

joomla-db  | 2024-10-13T13:30:26.852232Z 0 [System] [MY-013602] [Server] Channel mysql_main configured to support TLS. Encrypted connections are now
joomla-app  | ========================================================================
joomla-app  |
joomla-app  |
joomla-app  | Ensuring Joomla database is present
joomla-app  |
joomla-app  | MySQL Database Created
joomla-app  |  This server is now configured to run Joomla!
joomla-app  |
joomla-app  |   NOTE: You will need your database server address, database name,
joomla-app  |         and database user credentials to install Joomla.
joomla-app  |
joomla-app  | ========================================================================
joomla-app  | AH00558: apache2: Could not reliably determine the server's fully qualified domain name, using 172.19.0.3. Set the 'ServerName' directive globally to suppress this message

[...]

joomla-app  | [Fri Oct 04 13:31:46.880743 2024] [mpm_prefork:notice] [pid 1:tid 1] AH00163: Apache/2.4.62 (Debian) PHP/8.3.12 configured -- resuming normal operations
joomla-app  | [Fri Oct 04 13:31:46.880782 2024] [core:notice] [pid 1:tid 1] AH00094: Command line: 'apache2 -D FOREGROUND'
joomla-app  | 172.19.0.1 - - [04/Oct/2024:06:57:36 +0000] "POST /installation/index.php HTTP/1.1" 200 6497 "http://127.0.0.1:8080/installation/index.php" "Mozilla/5.0 (Windows NT 10.0; Win64; x64) AppleWebKit/537.36 (KHTML, like Gecko) Chrome/129.0.0.0 Safari/537.36 Edg/129.0.0.0"
Time to starting the website
Once make up has been fired and your containers in a Up state, our Joomla site is ready.
You will need some information like credentials for the database; this is why the make start screen was defined.
Please run make start in console. You'll get a screen like the one below:
To start your site, please jump to http://127.0.0.1:8080

Go to http://127.0.0.1:8080/administrator to open your backend.

Below a summary of your current installation:

JOOMLA

  * Project name              running-joomla-in-docker
  * Version                   5.2.0-php8.3-apache
  * Port                      8080

DATABASE

  * Host                      joomla-db
  * User name                 joomla
  * Password                  examplepass
  * Database name             joomla
  * Version                   8.4.2
  * Port                      3306
As you can see, the port number is 8080; the one we've specified in our .env file. Simply CTRL click on the URL if your terminal support this option (otherwise, manually start your preferred web browser and navigate to the specified URL).
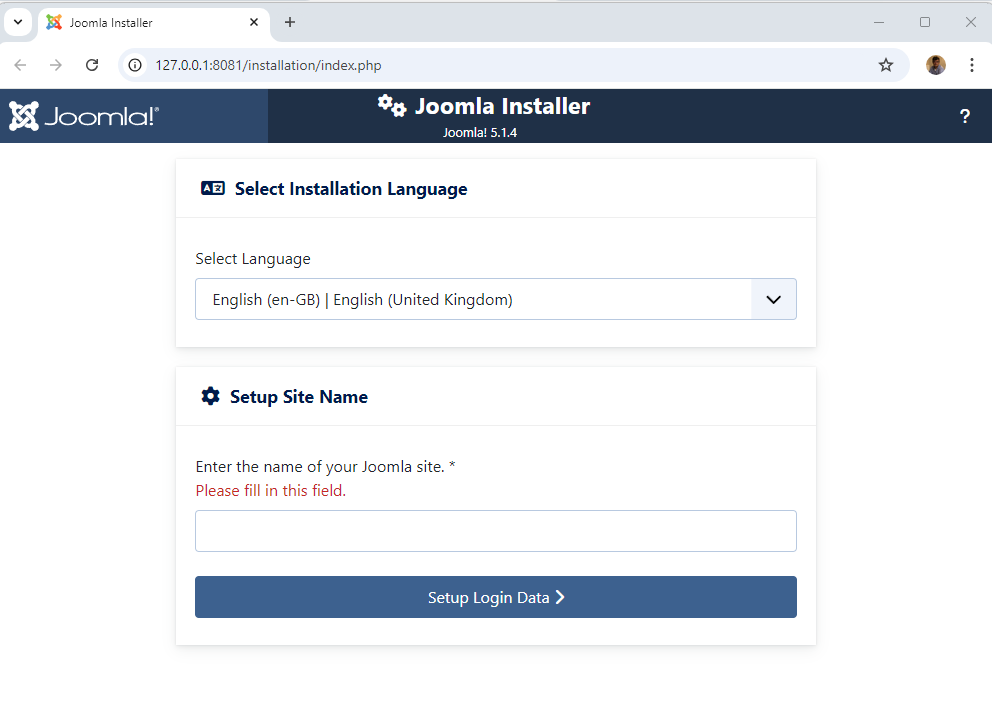
Congratulations, you have successfully installed a fresh Joomla website using Docker!
You'll need to configure your new fresh site. In the Database Configuration screen, you'll need to fill in the Host, the username, the password and the database name. This information is displayed on the console; thanks make start. Just use these values when prompted.
Time for a break
What have we seen so far?
- Without having anything other than Docker you can install Joomla and MySQL from the command line, in the version you want;
- That with an
.envfile we can vary certain values to allow us to have several projects on our hard drive (several Joomla sites); - That with the
compose.yamlfile we tell Docker what to do to make Joomla and MySQL talk each other, and - The
compose.yamlfile is valuable since it allows you to define a number of configuration variables.
Let's go a little further.
Advanced configuration for Joomla
The official Joomla Docker image is maintained by the Joomla community on Docker Hub: https://hub.docker.com/_/joomla.
You'll retrieve there a list of tags i.e. a list of versions you can install using Docker but you'll also find a How to use this image section and that one is really useful.
Below the list of variables supported by Joomla by the end of September 2024:
| Variable name | Description |
|---|---|
JOOMLA_DB_HOST | Defaults to the IP and port of the linked mysql container |
JOOMLA_DB_USER | Defaults to root |
JOOMLA_DB_PASSWORD | Defaults to the value of the MYSQL_ROOT_PASSWORD environment variable from the linked mysql container |
JOOMLA_DB_PASSWORD_FILE | Path to a file containing the database password |
JOOMLA_DB_NAME | Defaults to joomla |
JOOMLA_DB_TYPE | Defaults to mysqli; options: mysqli, pgsql |
The following environment variables are also recognised for configuring auto deployment (i.e. skip the browser setup) for your Joomla instance:
| Variable name | Description |
|---|---|
JOOMLA_SITE_NAME | Name of the Joomla site |
JOOMLA_ADMIN_USER | Full name of the Joomla administrator |
JOOMLA_ADMIN_USERNAME | Username of the Joomla administrator |
JOOMLA_ADMIN_PASSWORD | Password of the Joomla administrator |
JOOMLA_ADMIN_EMAIL | Email address of the Joomla administrator |
JOOMLA_EXTENSIONS_URLS | Semicolon-separated list of URLs to install Joomla extensions from |
JOOMLA_EXTENSIONS_PATHS | Semicolon-separated list of file paths to install Joomla extensions from |
JOOMLA_SMTP_HOST | SMTP host for outgoing email |
JOOMLA_SMTP_HOST_PORT | SMTP port for outgoing email |
Pay attention to the last table here above.
We could therefore completely ignore the Joomla configuration screens!!! By specifying certain values, we could therefore install a beautiful, fresh Joomla and already display a functional website.
Let's try.
We'll update our three files to skip the installation process by predefining values like the name and the password for our administrator.
Updated compose.yaml
We'll edit our compose.yaml file and add new entries:
name: ${PROJECT_NAME:-your-project-name}

services:
  joomla:
    image: joomla:${JOOMLA_VERSION:-latest}
    container_name: ${CONTAINER_PREFIX:-joomla}-app
    restart: always
    ports:
      - ${WEB_PORT:-8080}:80
    environment:
      - JOOMLA_DB_HOST=joomladb
      - JOOMLA_DB_NAME=${DB_NAME:-joomla}
      - JOOMLA_DB_PASSWORD=${DB_PASSWORD:-examplepass}
      - JOOMLA_DB_USER=${DB_USER:-joomla}
      - JOOMLA_SITE_NAME=${JOOMLA_SITE_NAME:-Joomla}
      - JOOMLA_ADMIN_USER=${JOOMLA_ADMIN_USER:-Joomla Hero}
      - JOOMLA_ADMIN_USERNAME=${JOOMLA_ADMIN_USERNAME:-joomla}
      - JOOMLA_ADMIN_PASSWORD=${JOOMLA_ADMIN_PASSWORD:-joomla@secured}
      - JOOMLA_ADMIN_EMAIL=${JOOMLA_ADMIN_EMAIL:-joomla@example.com}
    depends_on:
      joomladb:
        condition: service_healthy
    user: ${UID:-1000}:${GID:-1000}
    volumes:
      - ./joomla_data:/var/www/html
    networks:
      - joomla_network

  joomladb:
    image: mysql:${MYSQL_VERSION:-latest}
    container_name: ${CONTAINER_PREFIX:-joomla}-db
    restart: always
    ports:
      - ${MYSQL_PORT-:3306}:3306
    environment:
      - MYSQL_DATABASE=${DB_NAME:-joomla}
      - MYSQL_PASSWORD=${DB_PASSWORD:-examplepass}
      - MYSQL_RANDOM_ROOT_PASSWORD='1'
      - MYSQL_USER=${DB_USER:-joomla}
    healthcheck:
      test: ["CMD", "mysqladmin" ,"ping", "-h", "localhost"]
      timeout: 20s
      retries: 10
    user: ${UID:-1000}:${GID:-1000}
    volumes:
      - ./db_data:/var/lib/mysql
    networks:
      - joomla_network

networks:
  joomla_network:
Updated .env
And we'll also update our .env file like this:
CONTAINER_PREFIX=joomla
DB_NAME=joomla
DB_PASSWORD=examplepass
DB_USER=joomla
JOOMLA_ADMIN_EMAIL=joomla@example.com
JOOMLA_ADMIN_PASSWORD=joomla@secured
JOOMLA_ADMIN_USER=Joomla Hero
JOOMLA_ADMIN_USERNAME=joomla
JOOMLA_SITE_NAME=Joomla
JOOMLA_VERSION=5.2.0-php8.3-apache
MYSQL_PORT=3306
MYSQL_VERSION=8.4.2
PROJECT_NAME=running-joomla-in-docker
WEB_PORT=8080
Updated makefile
And, finally, also update the makefile like this:
-include .env

config:
	@UID=$$(id -u) GID=$$(id -g) docker compose config

down: stop
	-@UID=$$(id -u) GID=$$(id -g) docker compose down

log:
	-@UID=$$(id -u) GID=$$(id -g) docker compose logs

reset: down
	-@rm -rf db_data joomla_data

start:
	@clear
	@printf "\033[1;33m%s\033[0m\n\n" "To start your site, please jump to http://127.0.0.1:${WEB_PORT}"
	@printf "\033[1;33m%s\033[0m\n\n" "Go to http://127.0.0.1:${WEB_PORT}/administrator to open your backend."

	@printf "\033[1;104m%s\033[0m\n\n" "Below a summary of your current installation:"

	@printf "\033[1;34m%s\033[0m\n\n" "JOOMLA"
	@printf "\033[1;34m%-30s\033[0m\033[1;104m%s\033[0m\n" "  * Project name" "${PROJECT_NAME}"
	@printf "\033[1;34m%-30s\033[0m\033[1;104m%s\033[0m\n" "  * Version" "${JOOMLA_VERSION}"
	@printf "\033[1;34m%-30s\033[0m\033[1;104m%s\033[0m\n" "  * Port" "${WEB_PORT}"

	@printf "\n\033[1;34m%s\033[0m\n\n" "  Administration"
	@printf "\033[1;34m%-30s\033[0m\033[1;104m%s\033[0m\n" "  * Site name" "${JOOMLA_SITE_NAME}"
	@printf "\033[1;34m%-30s\033[0m\033[1;104m%s\033[0m\n" "  * Admin friendly username" "${JOOMLA_ADMIN_USER}"
	@printf "\033[1;34m%-30s\033[0m\033[1;104m%s\033[0m\n" "  * Admin username" "${JOOMLA_ADMIN_USERNAME}"
	@printf "\033[1;34m%-30s\033[0m\033[1;104m%s\033[0m\n" "  * Admin password" "${JOOMLA_ADMIN_PASSWORD}"
	@printf "\033[1;34m%-30s\033[0m\033[1;104m%s\033[0m\n\n" "  * Admin email" "${JOOMLA_ADMIN_EMAIL}"

	@printf "\033[1;34m%s\033[0m\n\n" "DATABASE"
	@printf "\033[1;34m%-30s\033[0m\033[1;104m%s\033[0m\n" "  * Host" "joomla-db"
	@printf "\033[1;34m%-30s\033[0m\033[1;104m%s\033[0m\n" "  * User name" "${DB_USER}"
	@printf "\033[1;34m%-30s\033[0m\033[1;104m%s\033[0m\n" "  * Password" "${DB_PASSWORD}"
	@printf "\033[1;34m%-30s\033[0m\033[1;104m%s\033[0m\n" "  * Database name" "${DB_NAME}"
	@printf "\033[1;34m%-30s\033[0m\033[1;104m%s\033[0m\n" "  * Version" "${MYSQL_VERSION}"
	@printf "\033[1;34m%-30s\033[0m\033[1;104m%s\033[0m\n\n" "  * Port" "${MYSQL_PORT}"

stop:
	-@UID=$$(id -u) GID=$$(id -g) docker compose stop

up:
	-@mkdir -p db_data joomla_data
	@UID=$$(id -u) GID=$$(id -g) docker compose up --detach --build
As you can see, we've configured some JOOMLA_ADMIN_xxx keys and set JOOMLA_SITE_NAME to Joomla; the name of our website.
Running the website and skip the installation process
Once you've updated the three files; just run make reset (to remove our previous site if any) then run make up to create a new one. Finally, run make start to show a list of important variables:
You can fire the three actions in just one command: make reset && make up && make start
The output of make start will be:
To start your site, please jump to http://127.0.0.1:8080

Go to http://127.0.0.1:8080/administrator to open your backend.

Below a summary of your current installation:

JOOMLA

  * Project name              running-joomla-in-docker
  * Version                   5.2.0-php8.3-apache
  * Port                      8080

  Administration

  * Site name                 Joomla
  * Admin friendly username   Joomla Hero
  * Admin username            joomla
  * Admin password            joomla@secured
  * Admin email               joomla@example.com

DATABASE

  * Host                      joomla-db
  * Version                   8.4.2
  * Name                      joomla
  * User                      joomla
  * Password                  examplepass
  * Port                      3306
Now, by going to http://127.0.0.1:8080/administrator, you'll no more see the installation screens but, immediately, the login screen. The username to use is joomla and his password is joomla@secured (as you can see on the console).
Your Joomla site is already configured; nice no?
Time for a second break
Ok, so right now, we've seen how to create a fresh Joomla website in seconds with just the make up command and how to bypass the installation screens by already providing useful information in our .env file.
Let's try a real-world example: we are a small web agency and we wish to use Docker for our next projects and we already have three projects in our mind. Or, you're an individual having several websites; all with different Joomla versions.
Starting three different projects
Please create a structure like below i.e. cd /tmp/joomla && mkdir project_1 project_2 project_3.
Then go back to the Updated compose.yaml chapter and create the compose.yaml file in both the three projects' folder. Do the same for the .env and the makefile.
The same three files in the three projects folders.
At the end, you should have this structure in your /tmp/joomla folder:
❯ tree -a

├── project_1
│   ├── .env
│   ├── compose.yaml
│   └── makefile
├── project_2
│   ├── .env
│   ├── compose.yaml
│   └── makefile
└── project_3
    ├── .env
    ├── compose.yaml
    └── makefile
One directory by project and, again, our three files.
The tree command isn't native in Linux. If you wish to install it, just run sudo apt-get update && sudo apt-get install tree.
Project 1 - Joomla 5.2
In a very few words: we'll install Joomla 5.2 and MySQL 8.4.2.
Please configure the project_1/.env file with the following content.
As you can see (highlighted lines), that file is the same that the latest .env we've used earlier but:
- We'll set the
CONTAINER_PREFIXto an unique value; in our examplejoomla_5, - We need to do the same (i.e. define an unique value) for the MySQL port number; we can use the standard port
3306for our first project but, let's use3301(1because it's our first project) - You've understood; we'll do the same for
JOOMLA_SITE_NAMEandPROJECT_NAME; remain humble and opt forJoomla_5andjoomla5and - Finally, we need to define a web port number; we'll use
8081(so our site will be available onhttp://127.0.0.1:8081).
Here is the .env file for our first project:
CONTAINER_PREFIX=joomla_5
DB_NAME=joomla
DB_PASSWORD=examplepass
DB_USER=joomla
JOOMLA_ADMIN_EMAIL=joomla@example.com
JOOMLA_ADMIN_PASSWORD=joomla@secured
JOOMLA_ADMIN_USER=Joomla Hero
JOOMLA_ADMIN_USERNAME=joomla
JOOMLA_SITE_NAME=Joomla_5
JOOMLA_VERSION=5.2.0-php8.3-apache
MYSQL_PORT=3301
MYSQL_VERSION=8.4.2
PROJECT_NAME=joomla5
WEB_PORT=8081
Go to your console and run cd project_1 to jump in the first project's folder then make up to create Docker containers for project 1.
By going to http://127.0.0.1:8081/administrator/ we've our first admin page (as you can see, the site is well called Joomla_5 as expected).
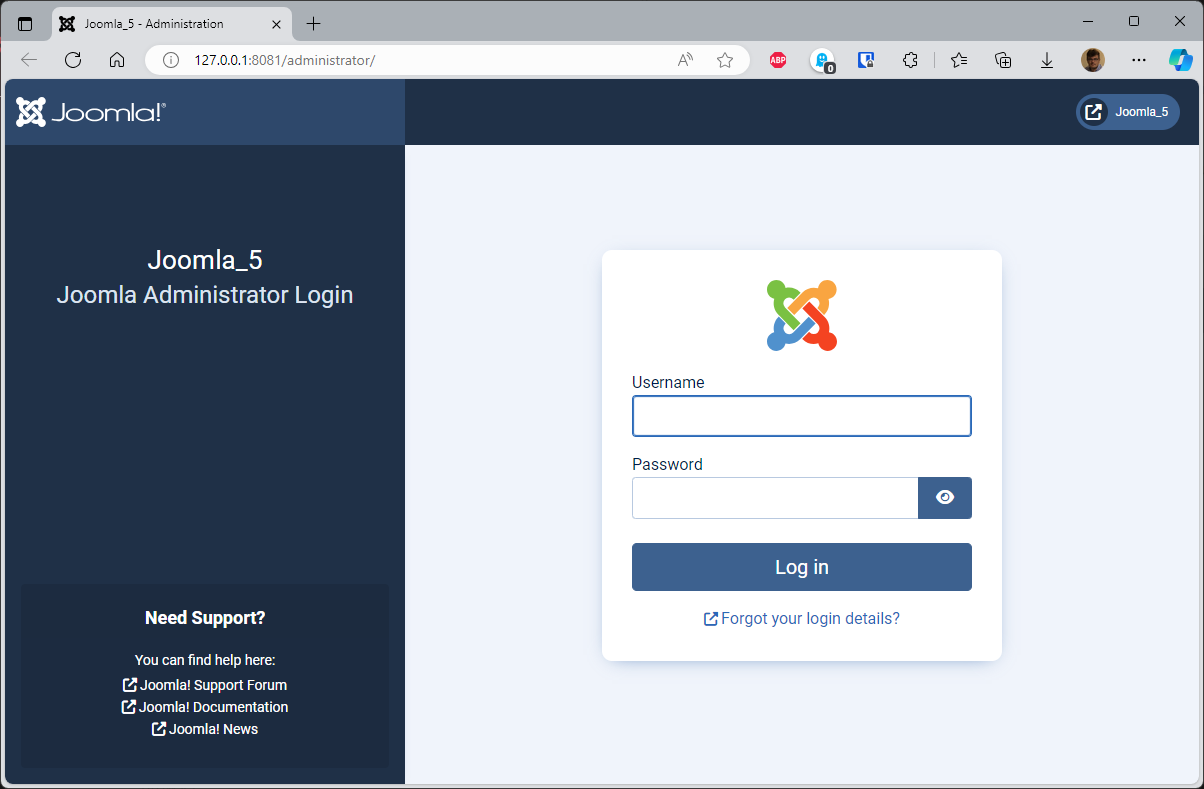
Please really be careful to specify the port number of our project. For project 1, the port number is 8081. As, in fact, we wished by setting the variable WEB_PORT.
So, to access to the first project, our URL is well http://127.0.0.1:8081.
Project 2 - Joomla 4.0
In a very few words: we'll install Joomla 4.0 and MySQL 5.7.37.
Please configure the project_2/.env with the following content. As you can see (highlighted lines), that file is the same that the latest .env we've used earlier but, just, we'll adjust the name of the project and the web port (so our site will be available on http://127.0.0.1:8082).
Do the same changes as for project 1 but just replace 1 by 2:
CONTAINER_PREFIX=joomla_4
DB_NAME=joomla
DB_PASSWORD=examplepass
DB_USER=joomla
JOOMLA_ADMIN_EMAIL=joomla@example.com
JOOMLA_ADMIN_PASSWORD=joomla@secured
JOOMLA_ADMIN_USER=Joomla Hero
JOOMLA_ADMIN_USERNAME=joomla
JOOMLA_SITE_NAME=Joomla_4
JOOMLA_VERSION=4.0.2-apache
MYSQL_PORT=3302
MYSQL_VERSION=5.7.37
PROJECT_NAME=joomla4
WEB_PORT=8082
Save the file and run make up to start the second website. Go to http://127.0.0.1:8082/administrator and yes, we've our second site running on our machine.
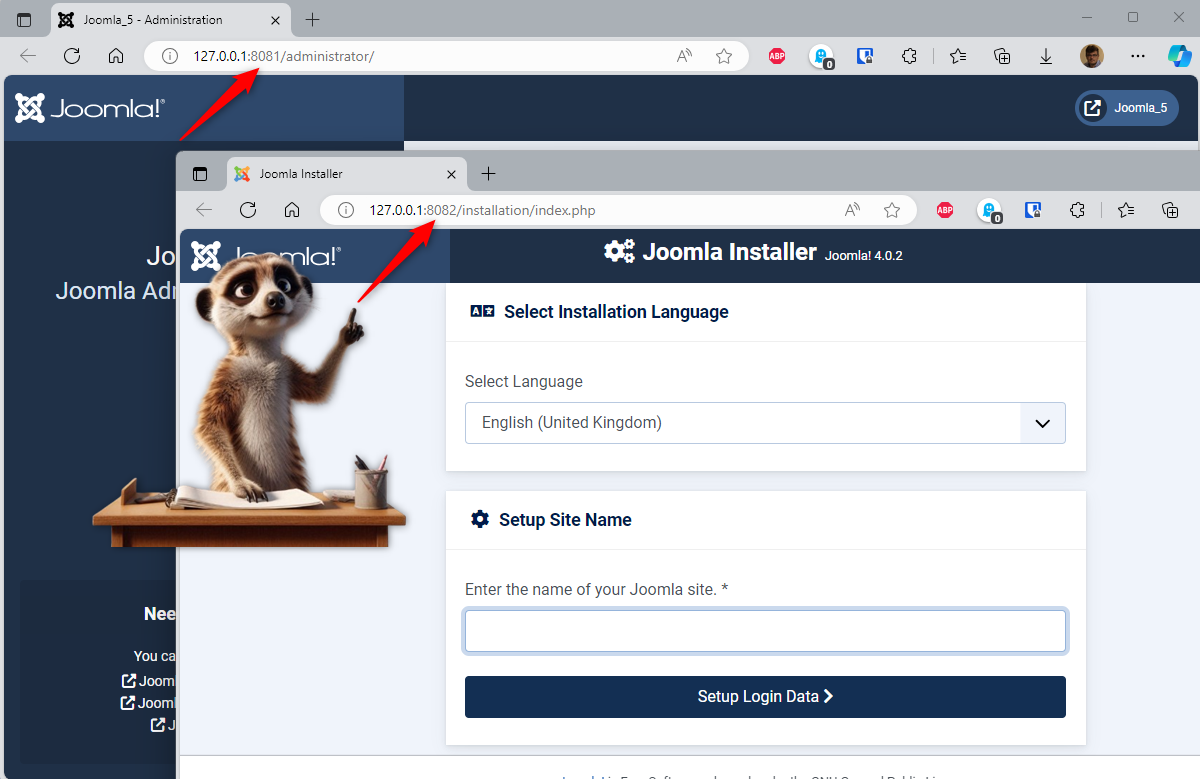
Did you see? We've two websites running on our computer. The first one is a Joomla 5.2 and the second one is Joomla 4.0.
If you're still awake after this long blog post, to get access to our second website, we need to go to http://127.0.0.1:8082.
Project 3 - Joomla 3.5
And now, you need to do some maintenance on an old J3.5 website. Let's create one on our computer.
Please now configure the project_3/.env with the following content.
This time, we'll use 3 as suffixes:
CONTAINER_PREFIX=joomla_3
DB_NAME=joomla
DB_PASSWORD=examplepass
DB_USER=joomla
JOOMLA_ADMIN_EMAIL=joomla@example.com
JOOMLA_ADMIN_PASSWORD=joomla@secured
JOOMLA_ADMIN_USER=Joomla Hero
JOOMLA_ADMIN_USERNAME=joomla
JOOMLA_SITE_NAME=Joomla_3
JOOMLA_VERSION=3.5.1-apache
MYSQL_PORT=3303
MYSQL_VERSION=5.7.31
PROJECT_NAME=joomla3
WEB_PORT=8083
Save the file and run make up && make start to start the second website. Go to http://127.0.0.1:8082/administrator and yes, we've our second site running on our machine.
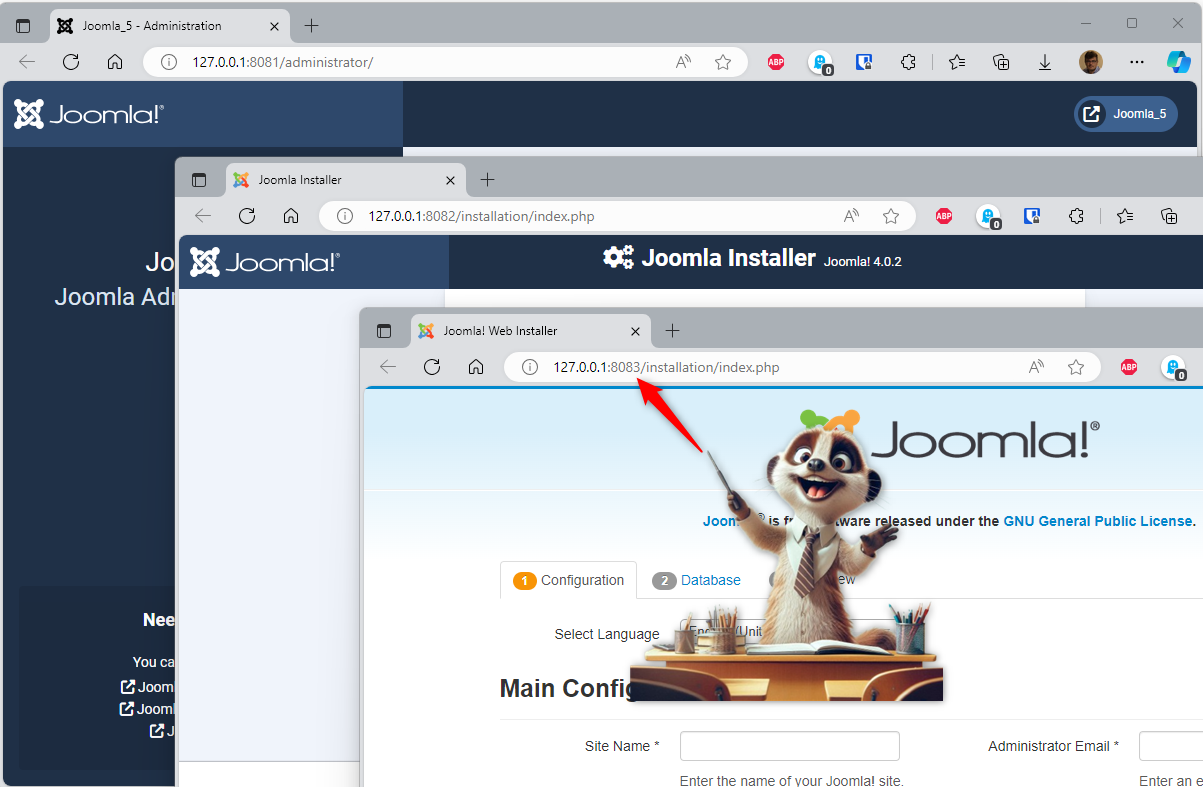
Three different Joomla versions, MySQL and too PHP and no conflict at all!
In fact, nothing surprising, it's normal with Docker: everything is isolated in its own container. 😊
Start all three projects in just one command
If I'm located in my /tmp/joomla folder; I can start my three projects at once like this:
cd project_1 && make up && cd ../project_2 && make up && cd ../project_3 && make up
Here is something you can get:
❯ cd project_1

❯ make up
[+] Running 3/23
 ✔ Network joomla_5_network  Created               0.0s
 ✔ Container joomla_5-db     Healthy              11.5s
 ✔ Container joomla_5-app    Started               0.4s

❯ cd ../project_2

❯ make up
[+] Running 3/3
 ✔ Network joomla_4_network  Created               0.0s
 ✔ Container joomla_4-db     Healthy              31.0s
 ✔ Container joomla_4-app    Started              31.4s

❯ cd ../project_3

❯ make up
[+] Running 3/3
 ✔ Network joomla_3_network  Created                0.0s
 ✔ Container joomla_3-db     Healthy               62.7s
 ✔ Container joomla_3-app    Started               61.5s
Other projects? How many sites can I have?
As we've just seen here, we can launch several Joomla projects at the same time on our machine and access them as easily as possible by varying the web port number (8081, 8082, 8083, ...).
But how many can I have? Well, that just depends on your machine.
For information, here's what I'm seeing right now on my Windows computer (I'm using Docker Desktop and WSL2).
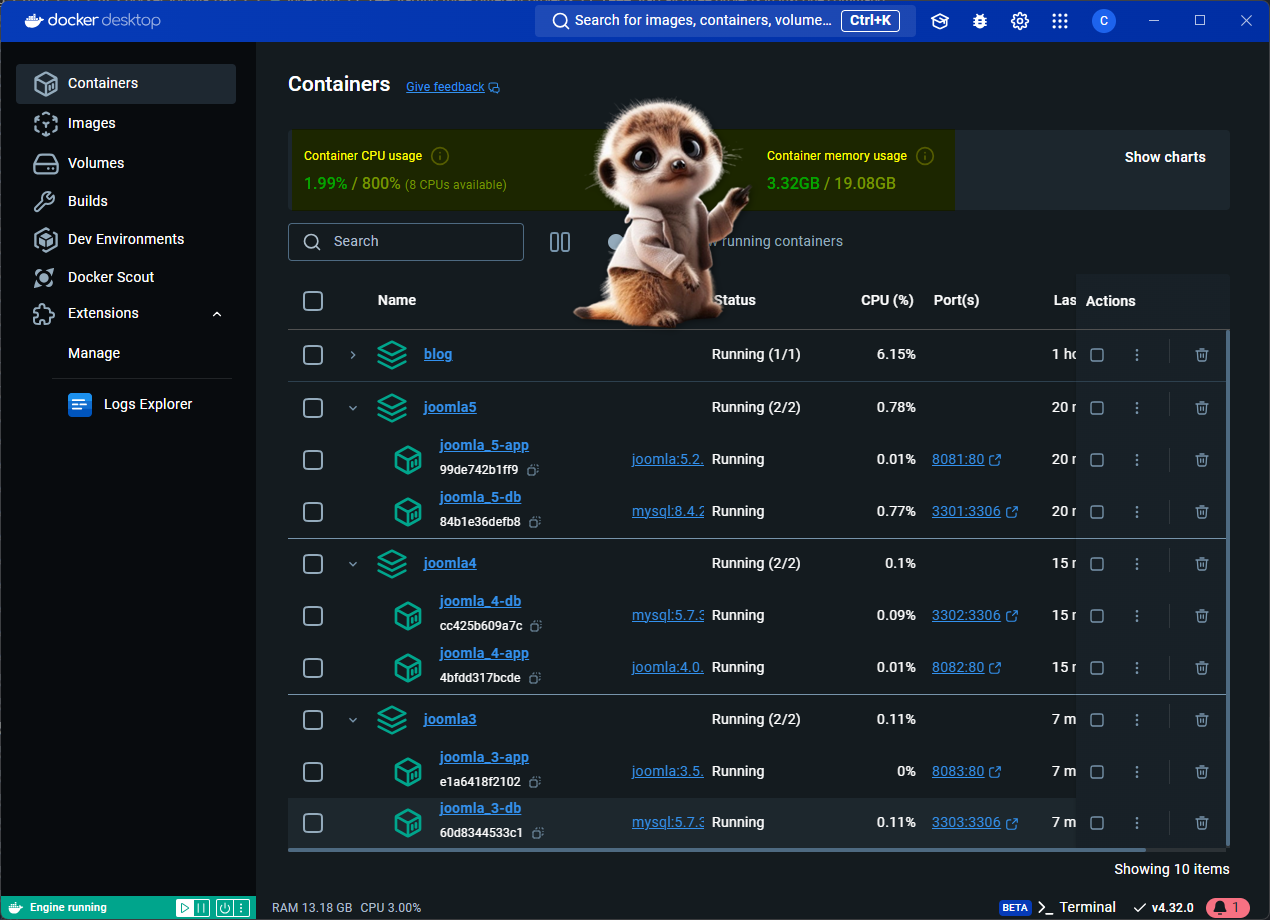
As you can see, I've actually four projects: my current blog (running on Docker too) and the three Joomla projects.
If you look at the CPU (%) column, you can see that the projects are almost asleep. And this is normal: once the web page has been displayed, Joomla and MySQL don't requires CPU anymore. The page is displayed so they are sleeping.
For the memory, I've allocated max. 20GB to WSL/Docker and right now, my fourth project (my blog too) are eating 3.3 GB. I can thus start a lot more projects.
But? Did I need to be able to work on the three projects at the same time??? Probably not. So why not stopping f.i. the first and the third project?
In the console, just run make stop in folder project 1 and 3 by, running ( cd project_1 ; make stop ; cd ../project_3 ; make stop). We'll thus stop (not remove; just freeze and release memory) our first and third project.
By looking back to Docker Desktop, we can indeed see we've earned 1GB RAM.
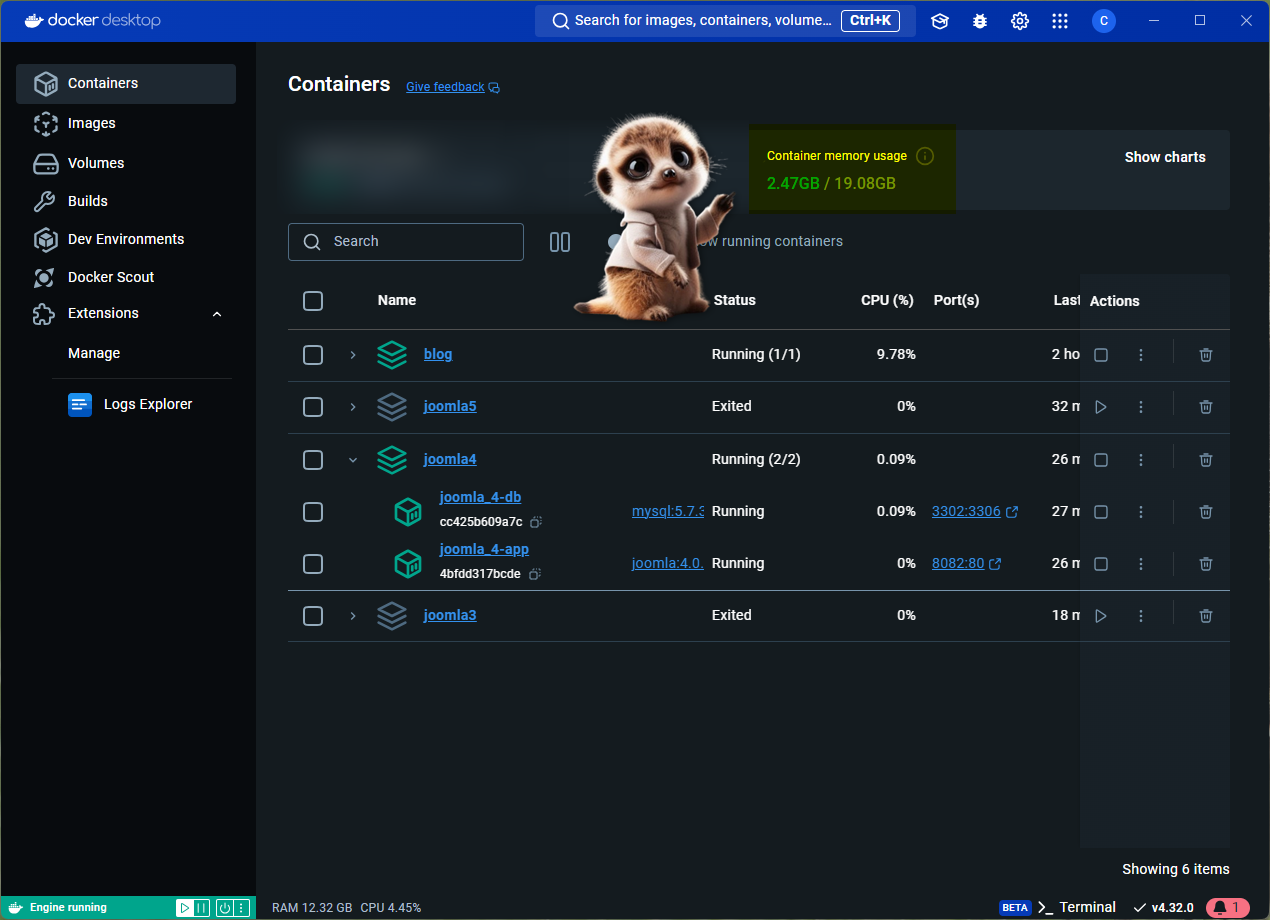
In our example here, we've just kept the second project so we can still work on http://127.0.0.1:8082/ but the two other projects (http://127.0.0.1:8081/ and http://127.0.0.1:8083/) won't respond anymore. We've stopped them.
Just run make up again in f.i. folder project_1 to make the site back to life. Or, if you prefer the GUI, in Docker Desktop, just click on the Start button:

Restoring a JPA backup using Docker
At this point, you might be wondering: this is all great, but I already have a Joomla site and I'd like to take a backup of my site and restore it locally using Docker; how can I do this?
If you're indeed wondering, read the next article: Restore a Joomla backup using Docker